
.\UFE\Plugin\UFE.dll\HitBoxesScript if you are not using the source version.User Tools
character:prefabs
Table of Contents
Character Prefabs
Here you will select the 3D model that represents this character. This model musts be encapsulated into a Prefab and it must have the following attached components:
- (SOURCE VERSION) Hit Boxes Script (
.\UFE\Scripts\Core\Physics\HitBoxesScript.cs) - (OTHER VERSIONS) Hit Boxes Script (
.\UFE\Plugins\UFE.dll\HitBoxesScript)
Watch this tutorial to learn how to create a character prefab or follow the tutorial below.
Create a character prefab
Follow the steps below to create a character prefab for UFE using your recently imported 3D model:
- Drag your character model from your project folder to the Hierarchy
- Using the Project window, navigate to
.\UFE\Scripts\Core\Physics\HitBoxesScript.cs1) and, with the character still selected, drag the script to the Inspector window. No further configuration is necessary. - Once you're done, drag the character back from Hierarchy to your desired folder in the Project window. Unity will automatically create a prefab.
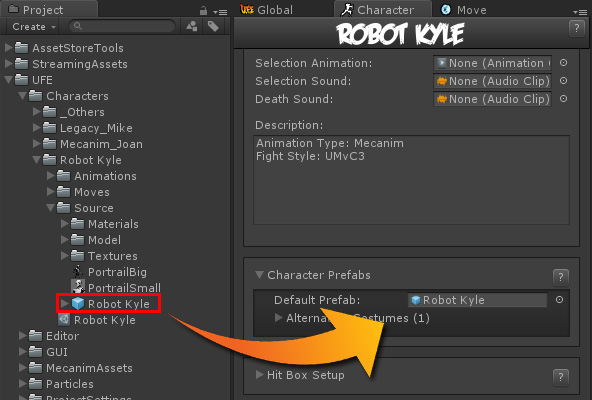
Now drag your newly created prefab to the Default Prefab under the Character Prefabs panel. Once you have your character in, you can select the prefab under HitBox Setup to see and edit your character's hitboxes.
If you are using Resources Folder as your loading method, write the path to the prefab file starting from the Resources folder. Example: If your character is located under Resources\Characters\MyCharacter, you should write Characters\MyCharacter.

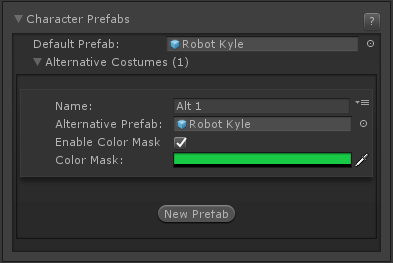
Alternative costumes
To create alternative costumes just unfold the option and click on New Prefab. Repeat the process above to create a different prefab and drag it to the Alternative Prefab field. You can also enable color masks if you just want to have quick color switches to your prefab.
Notes:
- UFE automatically attempts to load the first alternative costume listed if both players select the same character. Currently UFE does not have an UI template that allows for custom selection of alt costumes, but we hope to add that in the future. In the meantime feel free to create your own solutions using the open source GUI templates (
.GUI\UI Prefabs\CharacterSelectionScreen.prefaband.Scripts\UI\Templates\DefaultCharacterSelectionScreen.cs) selectable under GUI Options. - I strongly recommend engaging with the community to find solutions on how to interact and apply your custom costumes.
- Use Resources Folder as your loading method if your game is consuming too much memory (often happens on games with large rosters).
1)
character/prefabs.txt · Last modified: 2022/11/02 15:06 by FreedTerror