
User Tools
Table of Contents
UFE 2.0 Netcode
UFE Netcode is the second iteration of the network system for UFE. It allows the game to run online matches in a smooth lag-free environment thanks to its native rollback mechanics and deterministic physics. The netcode also uses raw manual tracking to its own core variables, optimizing CPU usage (even mobiles).
The new network options also comes with its own client/server structure (powered by Photon Network) allowing direct player connection without the use of IP.
The new Rollback netcode is available on UFE 2 PRO and UFE 2 Source. For more information click here.
How it works
UFE Netcode lets you use a combination of both Frame Delay and Rollback to achieve the best possible result for your game, both in visual and gameplay. Learning how to tweak the values is essential to determine your players experience.
- What is Rollback?
Rollback (name might change depending on game or developer) is a technique in which a game is able to return to a previous frame, change the outcome of an event (say, an input), and return to the current frame, all in a span of a single frame of animation. This allows a game to catch up with whatever concurrent event instead of waiting for both clients to sync up. When done right this can create an experience nearly identical to local play.
The subject can be extensive and have been topic of several games for years (often referred as GGPO). If you'd like to know more about the subject, there is a great video from Core-A Gaming on youtube: https://www.youtube.com/watch?v=0NLe4IpdS1w
- If Rollback is so good, why use Frame Delay at all?
Although most of us would prefer our games running at 0 frame delay, depending on your configurations rollbacks can be heavy on the CPU, and a constant attempt to jump time can have notable frame skips. Having a few frames of delay greatly optimize the situation, and thanks to the option Apply Frame Delay Offline your users can get used to a certain delay before engaging online opponents.
You can adjust the frame delay under the Frame Delay Options. The default value used for most cases is 4, but it can be changed depending on your need for animation blending or device limitation.
Converting to 2.0
This tutorial is meant for conversion between UFE 1 and 2. If you are starting from UFE 2 you can skip this step.
UFE 2.0 was developed with backwards compatibility in mind. Several processes were created specifically to deal with converting large amounts of data at once. A prototype of your project with the new netcode can be created in less then an hour if you know what you are doing. The whole process can be divided in 4 easy steps:
- Step 1: Running UFE Auto Update
 One of the key changes made to the code is the use of
 Fixed Point (Fix64), a format that replaces all uses of float throughout the code. If you are running UFE 1.x and wish to update your files without having to redo them, use this system to update all serialized Floats and Vectors to a new declaration.
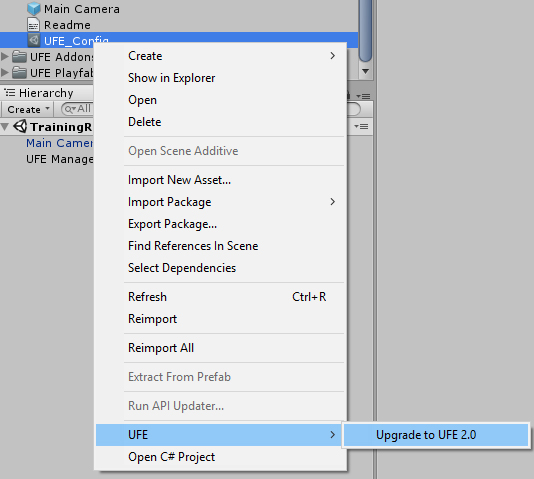
To run the auto update, right click on one of your UFE files (Global , Character or Move) from the project tab and select “UFE 2.0 → Update All Definitions”. This will automatically assign all the new variables (including nested files).
- Step 2: Update Character File
Next up is the HitBoxes' radius, rectangles and offsets. Because these values are recorded under the prefab itself we need to do this from the Character Editor. Open the Character under Hit Box Setup and hit “Restore Legacy Values”:
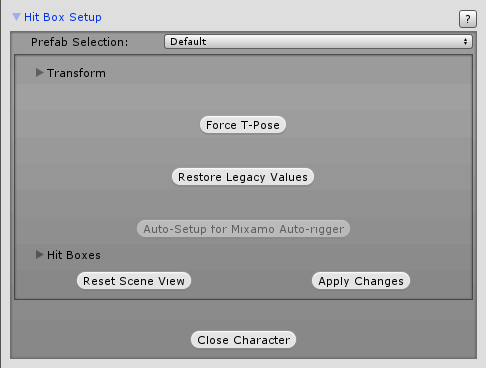 This will assign the Fix64 variables with their floats relatives inside each of the hitboxes. Now, just hit Apply Changes and close the character.
Remember: UFE 2.0 will start using the new Fix64 variables instead of floats, so pressing this button again will make the editor reset the variables to the previous floats values.
Now, under the Moveset, toggle 'Use Animation Maps'. This will ensure the engine uses the maps recorded on step 2 and not the legacy transform references.
Photon Setup
In order to have the client-server accessibility you need to download Photon Unity Networking and create your own Photon Account. Sign up for free: https://www.photonengine.com/en/PUN
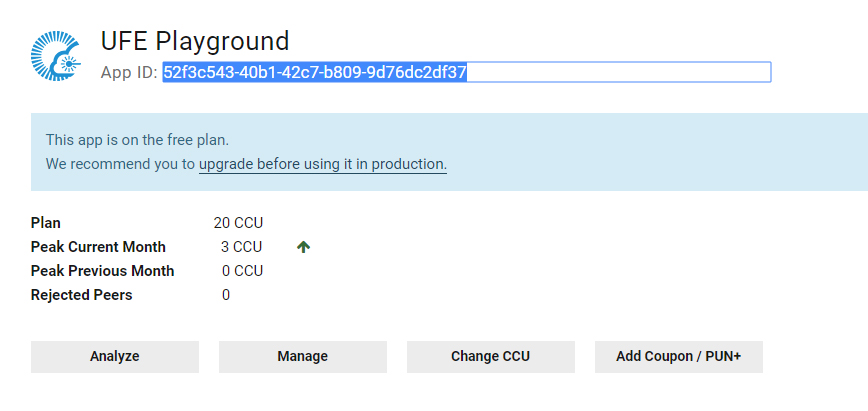
Once you have an account go your Public Cloud → Applications and copy your App ID as displayed here:
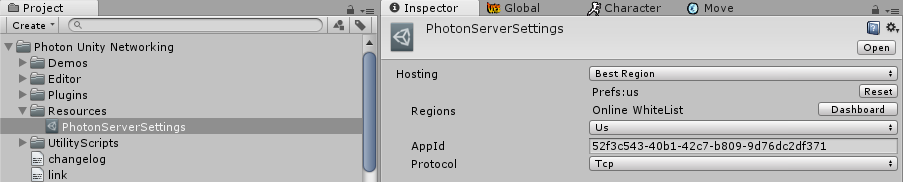
Once installed, go to \Photon Unity Networking\Resources\PhotonServerSettings, select the desired service and paste your APP ID:
Now double click on UFE\Engine\ThirdParty\PhotonAPI.unitypackage to extract the bride scripts then go to Global -> Network Options → Online Service and select Photon as your Network service.
You can also set a variety of connection options with the Photon Server Settings such as protocol used, hosting type and search by separated search regions. For more information visit this link.
And that is it! If you haven't missed any of the steps your game should be ready to be tested online. Remember to backup your project before replacing files and pay close attention to any customization you have done to the code. For more on how to make your own variables deterministic check out the Custom Code section below.
Map Recorder
One of the key elements that makes UFE easy to prototype is the guided transform hitbox system, meaning you only need to tell it where the joints are and UFE will take care of the rest. This means that we are tracking position information directly from the animation itself, and that value can only be read in float format (non-deterministic).
To solve this, Map Recorder runs and stores the position maps (and delta displacements) of all identified hitbox on every frame of animation throughout the character's moveset, saving them in Fix64 format (deterministic). The Engine will then play these maps synchronously to the animation during gameplay.
Map Recorder is located at UFE\Engine\MapRecorder.unity. Run it whenever you have to add new moves or change one of the character's animation files.

UFE Upgrader
For those who have made their own variables to the editor tools, another important tool in the conversion arsenal is the UFE Upgrader (\UFE\Editor\UFEUpgrade.cs) used on Step 1. This script gathers all legacy variables (floats/vectors) throughout subsequential assets and assign their values to their new respective related types. Codewise you can see that every old declaration has now a “relative” below its cast with the prefix “_”. If you need to bring some of your own code to UFE 2.0 and don't wanna lose data, make sure to study this script.
Custom Code
For those who need to have custom code in a synchronous form, UFE 2.0 provides some handy interfaces for controlled object spawn and variable tracking.
- Synchronous Prefab Instantiate
In a deterministic simulation, the code must result the same on both clients at the end of every single frame, so UFE needs to control whenever a game objects is instantiated or destroyed so it knows if an object should or shouldn't be there. If you wish to spawn something other than a particle effect or a projectile, use this static function to create it:
UFE.SpawnGameObject(GameObject gameObject, Vector3 position, Quaternion rotation)
UFE.SpawnGameObject(GameObject gameObject, Vector3 position, Quaternion rotation, long destroyTimer)
Parameters
gameObject - The Game Object you wish to instantiate.
position - The world position the object will appear.
rotation - Its initial rotation.
destroyTimer - How long (in frames) will the object last for. Ignore the parameter if the object is persistent.
using UnityEngine;
using System.Collections;

public class VaseController: MonoBehaviour {
	public GameObject vasePrefab;
	void Start () {
		UFE.SpawnGameObject(vasePrefab, new Vector3(), Quaternion.identity);
	}

	void DestroyVase () {
		UFE.DestroyGameObject(vasePrefab);
	}
}
- Variable Tracking: The RecordVar Attribute
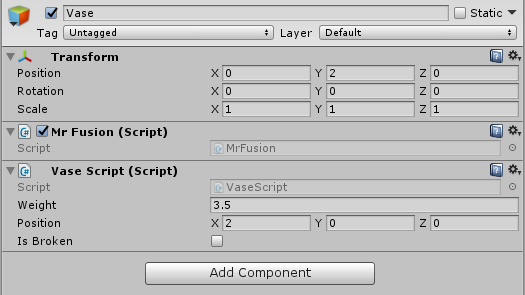
Besides controlling object spawns we also need to keep track of certain custom variables in our code. Let's say you have a custom script called VaseScript.cs on a game object called Vase. A handy way to deal with this is using MrFusion.cs, a script that allows you to track and restore any variable of your choice.
First we need to attach UFE\Scripts\Netcode\NetworkCore\MrFusion.cs to the GameObject/Prefab needed for custom tracking:
Once that is in place you can spawn this game object using UFE.SpawnGameObject (such as the code example above) and place the trackers onto the variables of your choice. The rule of thumb for deciding which variable to track comes down to its use as a constant. Here is an example:
using UnityEngine;
using System.Collections;
using UFENetcode;

// Make sure your class inherits UFEInterface as UFE tracks its signature.
public class VaseScript : UFEBehaviour, UFEInterface {
	public float weight;
	[RecordVar] public Vector3 position;
	[RecordVar] public bool isBroken;

	public override void UFEFixedUpdate() {
		if (position.y > .1f) BreakMe();
	}

	void BreakMe () {
		if (!isBroken) {
			UFE.DestroyGameObject(gameObject);
			isBroken = true;
		}
	}
}
Notice we only use the [RecordVar] attribute to track the variables that can change during gameplay. Weight doesn't need to be tracked because it's assumed that value is persistent. [RecordVar] variables must be public.
Also, notice we are using UFEFixedUpdate instead of FixedUpdate and UFEBehaviour instead of MonoBehaviour. This is so we can have those events deterministic.
An example of the auto-tracking system can be found under the projectile script: UFE\Scripts\ProjectileScripts.cs
- Manual tracking vs Auto tracking
One additional feature UFE offers is the native manual tracking. By default, all UFE variables that needs to be tracked are not tracked using RecordVar, but instead a set of structs designed to copy and store any changes to the core fields and properties. This method minimizes CPU usage by a large margin, and its recommended that you use this process for large amounts of data and dependency on low tier hardware (such as mobiles). For more on how this process is done check out the following scripts:
UFE\Scripts\Netcode\GameState\FluxStates.cs- Contains structs of all trackable variables in UFEUFE\Scripts\Netcode\NetworkCore\FluxStateTracker.cs- Contains the functions LoadState and SaveState.
If you want to find the tracks through UFE, search for #region trackable definitions under UFE code to see which variables are being manually tracked.
For a more in-depth explanation check out this post.
Network 2.0 Options

Video Tutorials
Hints
Networking is a relatively complicated aspect of the engine. Don't be alarmed if you can't get running at first. Here are a few hints to help out on common issues:
- Make sure your moves don't have empty references when using
UFE Upgrade. - The
Animation Recordertracks the animations based on what is listed on the character asset. If you have moves that are linked but not properly listed, the animation recorder might not find the animation. - Don't forget to toggle 'Use Animation Maps' under the Character Editor after recording your animations. UFE will not alert you about using legacy transform references, so if you're experiencing any desync, it is most likely this.
- Make sure you have no 'self-destruct' scripts attached to your particle effects. UFE needs to control the spawn and despawn of every GameObject. If you need to use one, use
UFE\Engine\Scripts\DestroyScript.csinstead.