
User Tools
installation
This is an old revision of the document!
Table of Contents
Requirement
- Some knowledge of fighting game terminologies and overall understanding of how it works (hit boxes, active frames, hit stun etc.)
- Unity 2019 or higher
- Basic understanding of Unity:
- Know your way around the basic tools (project, inspector, hierarchy, console, scene view)
- Terminologies
- How to use prefabs
- How to handle your own 3D models and animations
- For more information and full documentation please visit ufe3d.com
- For more on Unity, visit unity3d.com
Package
Asset Store:
- Go to Window > Asset Store > Downloaded Assets
- Select UFE 2 and click on the Import/Update button.
Payhip:
- Double click the unitypackage file or
- Go to Main Menu > Assets > Import Package > Custom Package
- Browse to the location of the downloaded unitypackage and open it.
Project Settings
Upon installation UFE will attempt to automatically update the Input Manager under Project Settings. If this fails, you might end up with a few errors such as controls not working or characters falling off the screen. A common description of this error can be found in the Unity's error console as “UnityException: Input Axis (..) is not setup”.
To fix this error and update your Input Manager settings follow these steps:
- Close Unity.
- Using the explorer and navigate to
(Project Folder)\Assets\UFE\ProjectSettings - Open
ProjectSettings.zip - Extract its content to
(Project Folder)\ProjectSettings - Reopen your project in Unity
Getting Started

Opening the demo files:
- Navigate to
UFE\Demo\(orUFE\Demos\[game-mode]) and double clickDemo.unity. Hit play to start the Demo. - To open the global config file for the demo, click on
UFE\Demo\Config.assetand under the inspector, click to open the Global Editor. - To edit a Character file, navigate to
UFE\Demo\Characters\[Character]\[Character].assetor, under the Global Editor, select Characters. - To edit a Move file, unfold the Move Set option under the Character Editor or navigate to
.\UFE\Characters\[Character]\Moves\[Move].asset. - You can also open any of the editors from the top toolbar under
Window → U.F.E.. - To create a new UFE file, under the Project Tab, click
Create→UFEand select the file of your choice.
Starting a new scene:
- Click File > New Scene
- Make sure you have a camera on scene (Hierarchy view).
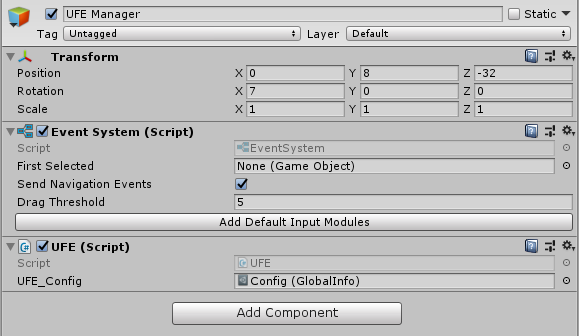
- Create a new Game Object, click
Add componentand typeUFE. - Drag your Global Config file under
UFE_Config, make sure you have your characters and moves setup and hit play.
Updates
To update an existing copy of your UFE follow these instructions. If you are updating from UFE 1 to UFE 2, follow these instructions after importing your project.
installation.1611992503.txt.gz · Last modified: 2021/01/30 02:41 by Mistermind